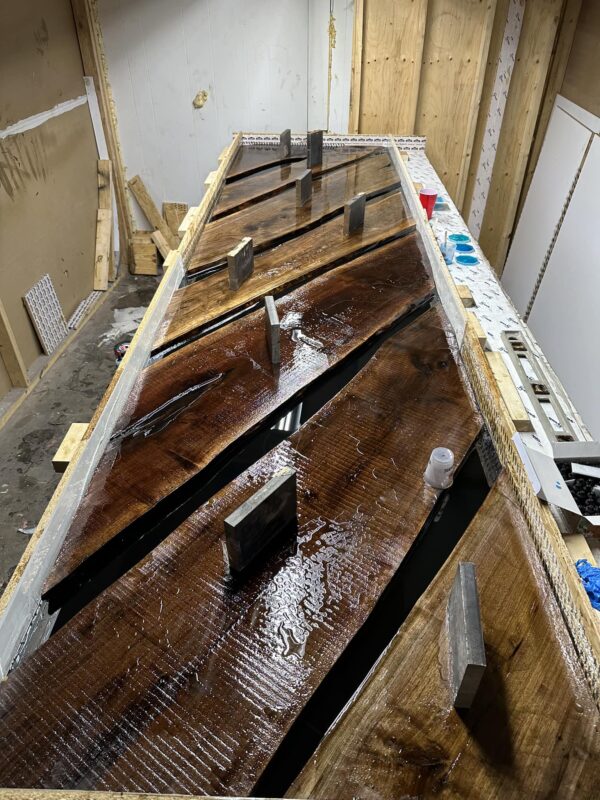
Creating a stunning epoxy resin table requires a well-constructed mold to shape and contain the resin during the curing process. The mold is crucial for achieving the desired dimensions and finish. This guide will walk you through the process of building molds for epoxy resin tables, using three different types of materials: melamine, HDPE (High-Density Polyethylene), and plywood. We’ll also cover the importance of using tape and mold release agents to ensure a smooth and successful project.
Why Molds Are Essential for Epoxy Resin Tables
Molds are essential for several reasons:
- Shape and Structure: Molds define the shape and dimensions of your epoxy resin table, ensuring a uniform and consistent outcome.
- Containment: They contain the resin, preventing it from spilling and allowing it to cure properly.
- Surface Finish: A well-made mold can contribute to a smoother surface finish, reducing the amount of sanding and polishing required later.
Materials for Building Molds
1. Melamine
Melamine is a popular choice for building epoxy resin molds due to its smooth surface and affordability.
Steps to Build a Melamine Mold
- Gather Materials:
- Melamine boards
- Screws
- Measuring tape
- Circular saw or table saw
- Drill
- Cut the Melamine Boards:
- Measure and cut the boards to the desired dimensions of your table. Ensure that the sides are cut to the height of the table plus a little extra to accommodate any overflow.
- Assemble the Mold:
- Use screws to assemble the mold, making sure the corners are square and the sides are securely fastened.
- Seal the Edges:
- Apply packing tape or duct tape along the seams and edges to prevent resin from leaking out.
- Apply Mold Release:
- Spray or brush a mold release agent onto the interior surfaces of the mold. This will make it easier to remove the cured epoxy table from the mold.
2. HDPE (High-Density Polyethylene)
HDPE is a durable, non-stick material that is highly effective for epoxy resin molds but can be more expensive.
Steps to Build an HDPE Mold
- Gather Materials:
- HDPE sheets
- Screws or clamps
- Measuring tape
- Circular saw or table saw
- Drill
- Cut the HDPE Sheets:
- Measure and cut the HDPE sheets to the desired dimensions of your table. Ensure the sides are the correct height.
- Assemble the Mold:
- Assemble the mold using screws or clamps. HDPE can be slippery, so make sure the sides are securely attached.
- Seal the Edges:
- Even though HDPE is non-stick, it’s still a good idea to apply tape to the seams for extra protection against leaks.
- Apply Mold Release:
- While HDPE is naturally non-stick, applying a mold release agent can further ease the demolding process.
3. Plywood
Plywood is a budget-friendly option, though it requires more preparation to ensure a smooth finish and prevent resin from sticking.
Steps to Build a Plywood Mold
- Gather Materials:
- Plywood sheets
- Screws
- Measuring tape
- Circular saw or table saw
- Drill
- Polyethylene or plastic sheeting
- Cut the Plywood Sheets:
- Measure and cut the plywood sheets to the desired dimensions. Cut the sides to the appropriate height.
- Assemble the Mold:
- Assemble the mold using screws, ensuring all corners are square and the sides are secure.
- Line the Mold:
- Line the interior of the mold with polyethylene or plastic sheeting to prevent the resin from sticking to the plywood. Use tape to secure the lining.
- Apply Mold Release:
- Apply a mold release agent over the plastic sheeting to further ensure the epoxy doesn’t adhere to the mold.
Importance of Using Tape and Mold Release
Tape
Using tape is crucial for sealing the seams and edges of your mold. It serves two main purposes:
- Prevent Leaks: Tape helps to seal any gaps or seams in the mold, preventing resin from leaking out during the curing process.
- Easy Demolding: Taping the edges and seams makes it easier to disassemble the mold without damaging the cured epoxy table.
Mold Release Agent
A mold release agent is essential for ensuring that the cured epoxy resin can be easily removed from the mold. The benefits include:
- Prevent Sticking: It prevents the resin from adhering to the mold surfaces, which can make demolding difficult and potentially damage the finished piece.
- Smooth Finish: Using a mold release agent helps achieve a smoother surface finish, reducing the need for extensive sanding and polishing.
Conclusion
Building a mold for your epoxy resin table is a critical step that significantly influences the final outcome of your project. By choosing the right materials, such as melamine, HDPE, or plywood, and properly preparing your mold with tape and a mold release agent, you can ensure a successful and smooth process. Taking the time to construct a well-made mold will pay off in the quality and appearance of your finished epoxy resin table, making your hard work truly shine.

