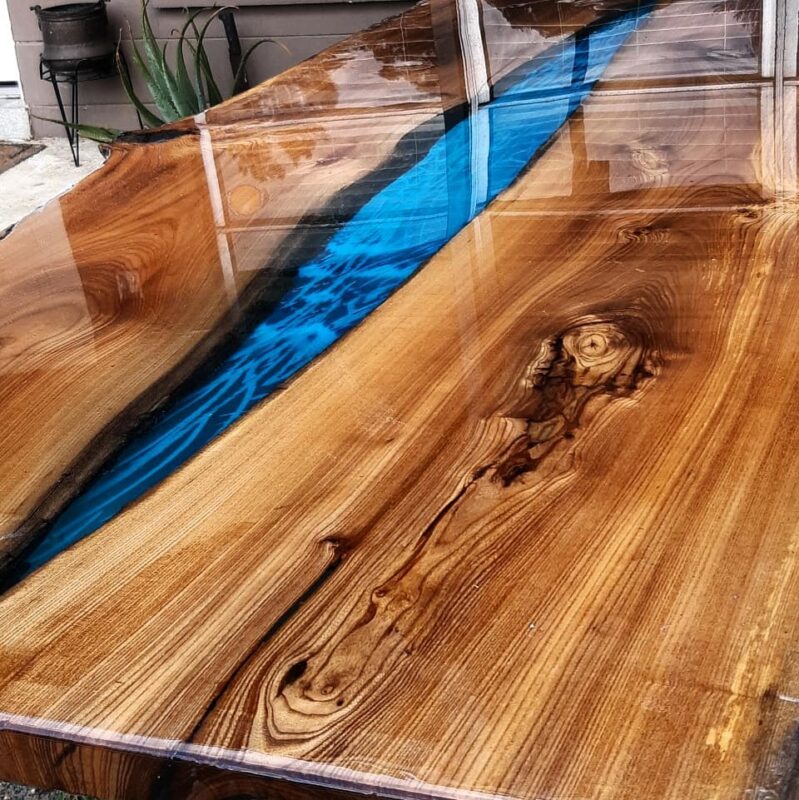
Creating an epoxy resin table can be an incredibly rewarding project, but to achieve that perfect glossy finish, proper polishing is essential. One of the most effective ways to polish an epoxy resin table is by using the 3M Perfect-It Polishing System. In this comprehensive guide, we will walk you through the entire process, ensuring your table gleams with a professional finish.
Why Choose the 3M Perfect-It Polishing System?
The 3M Perfect-It Polishing System is renowned for its efficiency and high-quality results. This system is designed to remove sanding scratches, oxidation, and other imperfections, leaving your epoxy resin table with a mirror-like finish. The system includes various compounds and pads that work together to produce a flawless surface.
Materials and Tools Needed
Before you begin, gather the following materials and tools:
- 3M Perfect-It Polishing System:
- 3M Perfect-It EX Rubbing Compound
- 3M Perfect-It Machine Polish
- 3M Perfect-It Ultrafine Machine Polish
- 3M polishing pads (wool and foam)
- Variable speed polisher with appropriate backing plate
- Microfiber cloths
- Protective gear (gloves, safety glasses, dust mask)
- Water spray bottle (for keeping the surface moist)
- Epoxy resin table (fully cured)
Step-by-Step Polishing Process
Step 1: Preparation
- Clean the Surface:
Ensure your epoxy resin table is clean and free of dust and debris. Use a soft cloth to wipe down the surface, removing any contaminants that could interfere with the polishing process. - Safety First:
Wear protective gear, including gloves, safety glasses, and a dust mask, to protect yourself from dust and chemicals.
Step 2: Sanding (If Needed)
If your epoxy resin table has significant imperfections or an uneven surface, you may need to sand it before polishing. Start with a coarse grit sandpaper (e.g., 800 grit) and gradually work your way up to finer grits (e.g., 1500 or 2000 grit).
- Wet Sanding:
Sand the surface with water to prevent clogging and overheating. Keep the surface and sandpaper wet by using a spray bottle. - Even Sanding:
Use a circular motion to sand evenly, ensuring you cover the entire surface. Periodically wipe the surface with a clean, damp cloth to check your progress.
Step 3: Applying the 3M Perfect-It Rubbing Compound
- Attach the Wool Pad:
Attach the 3M wool pad to your polisher. The wool pad is effective at removing heavy scratches and oxidation. - Apply Rubbing Compound:
Apply a small amount of 3M Perfect-It EX Rubbing Compound to the surface of the pad or directly onto the epoxy table. Spread it evenly. - Polish the Surface:
Turn on the polisher at a low speed to spread the compound, then increase the speed as you work. Use a crosshatch pattern to ensure even coverage. Keep the pad moving to avoid overheating the epoxy. - Check Your Progress:
Wipe the surface with a clean microfiber cloth to check your progress. If needed, reapply the compound and continue polishing until the desired level of smoothness is achieved.
Step 4: Applying the 3M Perfect-It Machine Polish
- Switch to Foam Pad:
Replace the wool pad with a foam polishing pad. The foam pad is gentler and helps refine the surface. - Apply Machine Polish:
Apply a small amount of 3M Perfect-It Machine Polish to the foam pad or the table surface. Spread it evenly. - Polish the Surface:
Use the polisher at a moderate speed, working in a crosshatch pattern. Keep the pad moving to avoid creating hot spots. - Wipe and Inspect:
Wipe the surface with a clean microfiber cloth to remove any residue and inspect the finish. The surface should now have a higher gloss and fewer imperfections.
Step 5: Applying the 3M Perfect-It Ultrafine Machine Polish
- Attach the Ultrafine Foam Pad:
Replace the foam polishing pad with an ultrafine foam pad. This pad is designed for the final polishing stage. - Apply Ultrafine Polish:
Apply a small amount of 3M Perfect-It Ultrafine Machine Polish to the pad or the table surface. Spread it evenly. - Final Polishing:
Use the polisher at a moderate speed, working in a crosshatch pattern. Keep the pad moving smoothly across the surface. - Final Wipe Down:
Wipe the surface with a clean microfiber cloth to remove any remaining polish. Inspect the surface for a high-gloss, mirror-like finish.
Step 6: Final Touches
- Clean Up:
Clean your polishing pads and tools. Store them properly for future use. - Admire Your Work:
Take a moment to admire the beautiful, polished finish on your epoxy resin table. The 3M Perfect-It Polishing System should have provided you with a professional-quality result.
Tips for Best Results
- Work in a Dust-Free Environment:
Polishing in a clean, dust-free environment helps prevent contaminants from marring the finish. - Take Your Time:
Rushing the polishing process can lead to uneven results. Take your time to ensure a thorough and even polish. - Use Quality Microfiber Cloths:
High-quality microfiber cloths are essential for wiping down the surface without scratching it. - Maintain Your Polisher:
Regularly clean and maintain your polisher to ensure it performs optimally.
Conclusion
Polishing an epoxy resin table with the 3M Perfect-It Polishing System can transform a rough surface into a gleaming masterpiece. By following these steps and using the right tools and techniques, you can achieve a professional-quality finish that showcases the beauty of your epoxy resin table. Remember to work patiently, maintain a clean workspace, and use high-quality materials for the best results. Enjoy the satisfaction of creating a stunning, polished piece that will be a centerpiece in any room.